
A solar bollard light is not a small street light. It is a low, glare-controlled fixture used to mark the edge of a path, guide pedestrians and give a landscape its night-time structure. That job changes the rules for height and spacing: the goal is continuity and comfort at eye level, not maximum lux on the ground.
This guide explains how height and spacing interact, gives planning bands from our own CPD and WOODPECKER ranges, and walks through a simple path calculation. It is a selection guide, not a lighting design; the final layout should still be checked against the project brief.
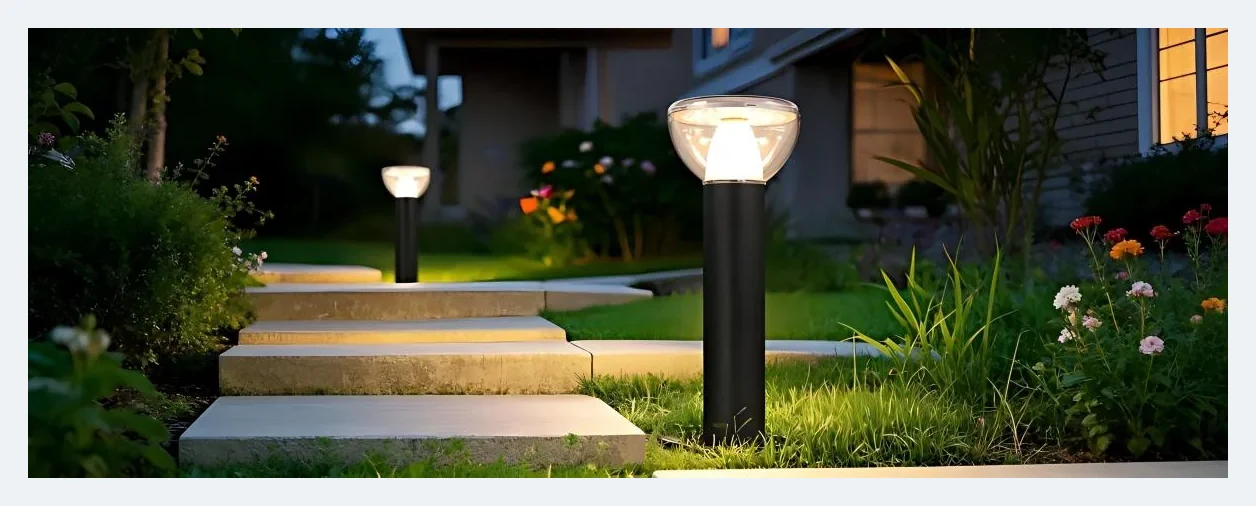
What a bollard is actually for
Bollards work at low mounting heights, typically 300–1,000 mm. At that level, the light is close to the pedestrian and the plants, so it can define a route with far less output than a post-top or street light. The trade-off is reach: a 600 mm bollard cannot light a 6 m wide road, and it should not try.
Use bollards for path edges, steps, driveway borders, garden rooms, hotel walkways, plaza edges and wayfinding. Use post-top or street lights when the task is to illuminate a road surface for vehicles. Mixing the two jobs is the most common reason a bollard layout looks either patchy or over-lit.
Height: what changes between 300, 600 and 1,000 mm
300–500 mm. The fixture sits below the knee. It throws a compact pool of light and keeps glare out of the pedestrian's eye, which makes it good for step edges, flower beds and tight paths. The pool is small, so spacing has to be tight for a continuous line.
600–800 mm. The most flexible band for garden paths and villa walkways. The light reaches a little further across the path, the fixture is less likely to be hidden by planting, and the glare is still controlled. This is the default starting point for a 1.2–2 m wide pedestrian route.
1,000 mm. Useful where the bollard must stand above low shrubs or sit at the edge of a driveway. It gives more spread and is easier to see from a distance, but it also puts the light source closer to eye level, so the optic and shielding matter more.
Taller is not automatically better. A 1,000 mm bollard at 2 m spacing will often look over-lit and glary; a 500 mm bollard at 6 m spacing will look like a series of isolated dots. Match height to the planting, the path width and the viewer's eye level.
Spacing: continuity first, then cost
The eye reads a path as a continuous line when the pools of light overlap or just touch. As a starting rule, spacing is about 4–6 times the mounting height for a pedestrian path: 600 mm bollards at 3–3.6 m, 1,000 mm bollards at 4–6 m. Tighter spacing gives a more continuous ribbon; wider spacing saves fixtures but turns the path into a sequence of separate pools.
Path width also matters. A 1 m path needs less overlap than a 3 m plaza edge. On a wide edge, either use two rows, a taller fixture, or a different product; simply stretching the spacing leaves dark gaps that the eye notices immediately.
A height and spacing ladder from our range
The table groups our bollard and path-light models by mounting height. Output and spacing are starting points for a pedestrian route, not fixed rules for every site.
| Height band | Example models | Lumen output | Typical use | Spacing start |
|---|---|---|---|---|
| 300–500 mm | CPD-0705, CPD-3004, CPD-5004 | 97–220 lm | Path edge, steps, flower beds | 2–3 m |
| 600–800 mm | CPD-1106, CPD-2204, CPD-3006 | 170–408 lm | Garden paths, villa walkways | 3–4 m |
| 1,000 mm | CPD-8804 | 246–260 lm | Driveway edges, plaza borders | 4–6 m |
| 1,600–2,400 lm | WOODPECKER LINE-1, TRI-180, CUBE-180 | 1,600–2,400 lm | Accent, wayfinding, larger landscape | 5–8 m |
The last row is a different product class: the WOODPECKER models are taller sculptural path lights with much higher output. They are useful when the landscape needs a visible vertical element, but they should not be treated as direct replacements for a 600 mm bollard.
Worked example: 1.2 m path, 600 mm bollard, 3 m spacing
Take a 1.2 m wide garden path, 600 mm bollards and 3 m spacing. The area served by one bollard is 1.2 × 3 = 3.6 m². At a modest 5 lux on the path, the light needed at ground level is 3.6 × 5 = 18 lm. A bollard distributes light in several directions, so a utilization factor of about 0.25 is a realistic first pass: 18 ÷ 0.25 = 72 lm at the fixture.
The CPD-0705 at 115 lm covers that with margin. If the brief asks for 10 lux, the same calculation gives 36 ÷ 0.25 = 144 lm, which moves the starting point to a 170–220 lm model or a tighter spacing. The arithmetic is only a shortlist; the optic, the planting and the surface colour decide the final look.
Mounting and solar panel orientation
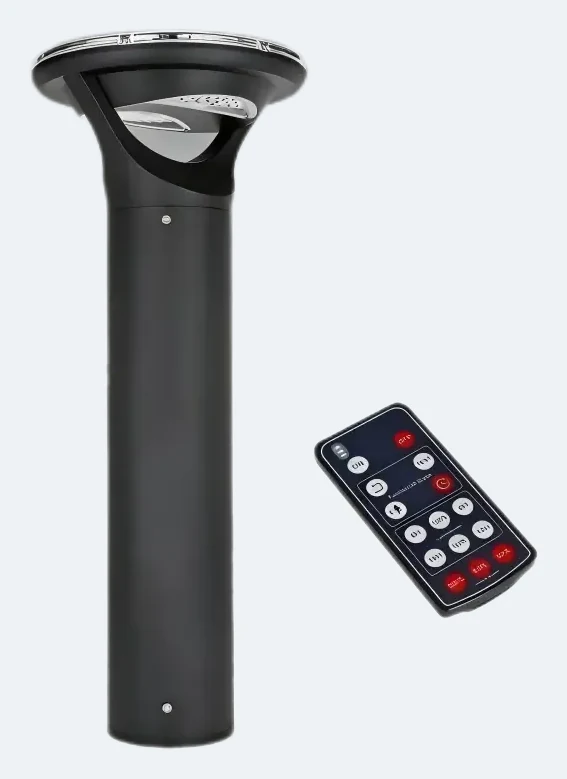
Most bollards are base-mounted on a concrete pad or fixed with anchor bolts; some garden models use a ground spike. The base detail matters more than it looks: a loose fixture will tilt, and a tilted solar panel loses charging performance every day. Check the base plate dimensions, the anchor type and the surface drainage before ordering.
The panel is usually integrated into the top of the bollard, so the fixture's rotation is the panel's orientation. In the Northern Hemisphere, face the panel south; in the Southern Hemisphere, face it north. Keep the panel out of the shade of walls, trees and the building, especially in winter when the sun is low. A bollard placed under a dense shrub will fail in exactly the season you need it most.
Common mistakes
- Spacing too wide. The path reads as separate pools instead of a line; the fix is tighter spacing or a taller fixture, not more lumens.
- Too much output at low height. A 400 lm bollard at 300 mm will glare; use a lower output or a shielded optic.
- Mixing colour temperatures. Keep one CCT along a path; 3000K and 6500K side by side looks accidental.
- Panel in shade. The bollard lights, but the battery never recovers; check the sun path before fixing the position.
- Ignoring the surface. Dark paving absorbs light; a path that looks bright on a render can read much darker on site.
What to send for a bollard layout
Send these five inputs and the layout can be checked rather than guessed:
- Path width and surface material.
- Preferred mounting height, or the planting height the bollard must clear.
- Spacing you want, or the length of path and number of fixtures.
- Target look: continuous ribbon, wayfinding dots, or accent.
- Site conditions: sun exposure, shade, coastal salt, ambient temperature.
The full range is on the solar bollard lights page, with garden and lawn models on the commercial solar garden lights hub. If the path also needs taller lighting, compare the solar post-top lights guide before mixing fixture types.
Frequently asked questions
What is the best height for a solar bollard light?
For a 1.2–2 m garden path, 600–800 mm is the most flexible band. Use 300–500 mm for step edges and tight planting, and 1,000 mm where the fixture must clear low shrubs or sit at a driveway edge.
How far apart should solar bollard lights be?
A practical starting point is 4–6 times the mounting height: 600 mm bollards at 3–3.6 m, 1,000 mm bollards at 4–6 m. Tighter spacing gives a continuous line; wider spacing saves fixtures but leaves dark gaps.
How many lumens does a solar bollard need?
Most path bollards sit between 100 and 400 lm. The exact figure depends on path width, spacing, surface colour and the target lux; use the calculation in this guide and confirm the optic on site.
Can a solar bollard light a driveway?
It can mark the edge of a driveway, but it is not a substitute for a street or post-top light. For vehicle visibility, use a taller fixture with a road-oriented optic; keep the bollard for the edge and the pedestrian route.
Why is my solar bollard dim in winter?
Shade and low sun are the usual causes. The panel needs direct sun for several hours; a fixture under a wall, tree or dense shrub will charge poorly. Check the panel orientation and move the fixture if needed.
Lay out a path that reads as one line
Send path width, surface, planting height and the look you want. We will return a bollard height, spacing and lumen shortlist.